All the information you need to create your first FAI report.
It’s been a long and arduous road but you’re almost ready for that first production run. You made it through supplier selection, your designs and production processes have been finalized, pre-production is finished and now there’s just one more hurdle to clear: First Article Inspection (FAI).
What is First Article Inspection?
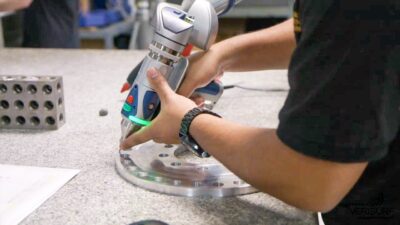
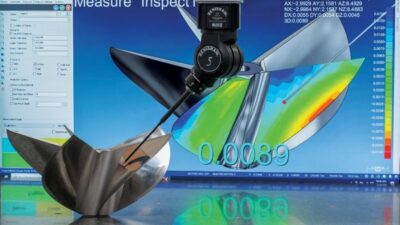
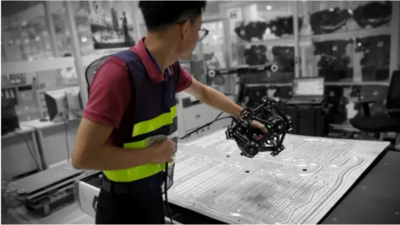
First article inspections are conducted by the supplier or an external inspector using metrology tools such as coordinate measuring machines (CMMs), 3D scanners, hand tools such as calipers and micrometers, and testing equipment such as scrape testers and multimeters. The inspector takes a random sample from the first production run and compares it against the customer specifications from the purchase order.
It’s important to remember that the goal of FAI is just to confirm that the product meets the specified dimensions and features according to the engineering drawing. In other words, FAI may be the first step in quality control, but it’s far from the last.
A first article inspection is not tantamount to a comprehensive evaluation of process capability, nor does it guarantee defect-free production. Assessing the overall process quality or the tool selection for each process is beyond the scope of an FAI. However, FAI can fulfill the process validation requirement for a quality management system, such as ISO9001 or AS/EN9100.
It’s also worth bearing in mind that you may need additional first article inspections if your initial one reveals something that’s not 100-percent compliant with the drawing. In such cases, you’ll need to take corrective action, do another production run and conduct another FAI.
When Do You Need a First Article Inspection?
There are two types of FAI: full and partial. Full FAIs are required for new parts, new suppliers or facilities, or if the part has not been manufactured in at least two years. A partial first article inspection—sometimes called a Delta FAI—is required if there are changes to the part’s design or production process, including new materials, tooling, machines or anything else that would potentially impact its fit, form or function.
In a nutshell: whenever you’re either about to start production of a new part, or you change something in the way an existing part is designed or manufactured, you ought to conduct a first article inspection. Additionally, you’ll need to conduct a (full) FAI if your customer requests one.
It should also be noted that, while FAIs can be required in any discrete manufacturing industry, they are most common in aerospace, automotive, defense and medical manufacturing. Each of these industries also have their own unique requirements that either operate separately from FAIs or subsume them. For example, a first article inspection is part of the AS9145 standard, Requirements for Advanced Product Quality Planning and Production Part Approval Process.
Creating a First Article Inspection Report
A First Article Inspection Report (FAIR) consists of three forms plus a balloon or bubble drawing:
- Form 1 – Part Number Accountability: summarizes the part of the article that is being inspected (the FAI part) and its associated sub-assemblies or detail parts.
- Form 2 – Product Accountability: used for all raw materials, specifications, processes and functional tests that are part of the design requirements.
- Form 3 – Characteristic Accountability: summarizes specific design characteristics, including dimensions, tolerances, drawing notes, etc., along with the actual measurement results of the FAI parts for design characteristics on the drawing.
The balloon drawing supports Form 3, appending a uniquely numbered balloon to each design characteristic which corresponds to the characteristics’ numbers on Form 3. These balloons or bubbles identify the characteristics that the inspector needs to check when conducting the FAI.
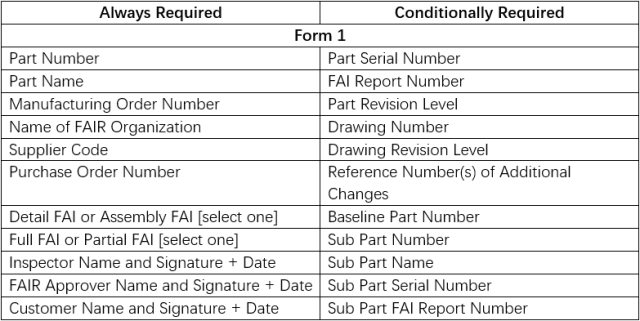
Each form includes fields that are always necessary to include (such as the part number, the date and the signature of the person who completed the form) and some that are conditionally required (such as the part serial number, the name of the raw material, or the tool identification number.)
A complete list of always required and conditionally required fields is included below:
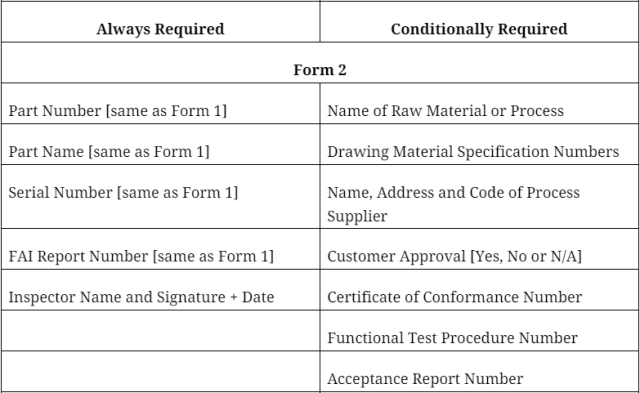
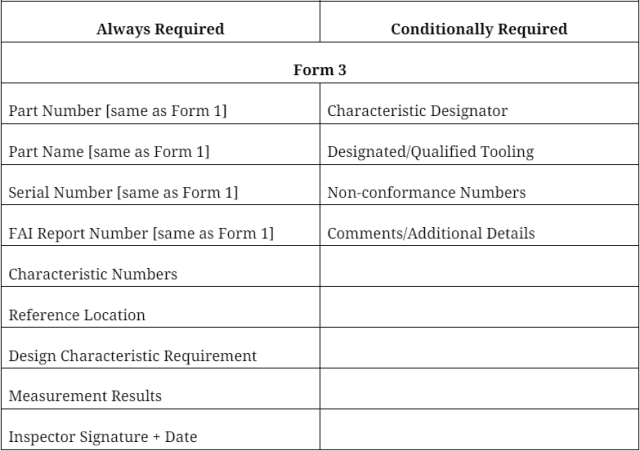
While many manufacturers still complete FAIRs on paper by hand, there are also various software tools and templates available that are designed to simplify and expedite the process of creating a first article inspection report. These include everything from Excel templates to CAD packages for automatically generating balloon drawings.
The First Article Inspection Process in 7 Steps
Step 1: Identify the Need for FAI
Determine whether you need a full or partial first article inspection depending on whether you’re producing a new or revised part.
Step 2: Conduct First Production Run
Manufacture the part using the same materials, machines, processes and tooling that will be used in mass production.
Step 3: Select a Sample
While sample sizes may vary depending on product requirements and industry standards, the sample should ideally be selected randomly, if possible.
Step 4: Perform First Article Inspection
Inspect the sample to verify compliance with product specifications, ensuring the characteristics fall within tolerances and that all measured results conform to customer requirements.
Step 5: Record Measured Results
Document the measurements obtained during inspection and record the values for each characteristic or design requirement.
Step 6: Generate First Article Inspection Report
Prepare the FAIR by filling out Form 1, Form 2 and Form 3, as well as the accompanying balloon drawing(s).
Step 7: Review and Approval
Have the FAIR reviewed by the relevant stakeholders—such as those responsible for quality control—and get approval from the customer by obtaining their name and signature.
Why FAI Matters
First article inspections are essential for ensuring that new and revised products conform to design specifications. By catching deviations and non-conformities early, they help minimize the risk of defects and safety hazards in the final product. They aren’t always easy, but the transparency and accountability they provide can be a competitive advantage, fostering better customer relationships and overall satisfaction.
