See your CAD models in the real world with augmented reality
Tired of seeing your designs only on a screen? Imagine viewing them in your home or workplace with render level quality. Augmented reality (AR) lets you bring your designs into the real world.
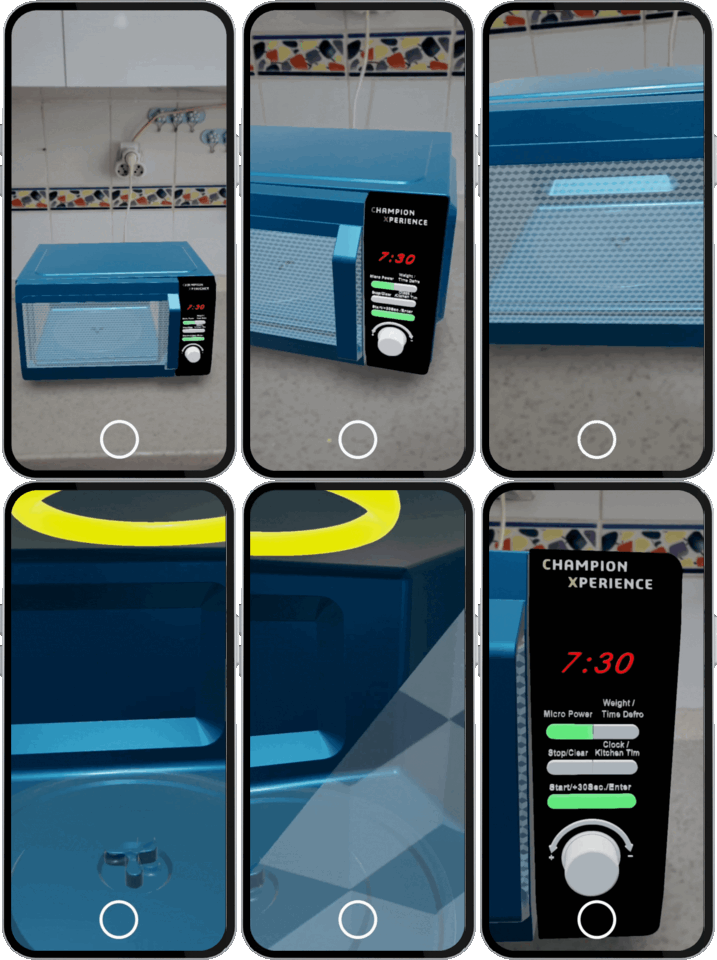
Preparation for AR environment
Transferring your designs to augmented reality is simple.
You need two things: a GLB file from xStudio, SolidWorks Visualize, or SolidWorks 2024, and a dode file containing HTML, JS, and CSS. Don’t worry about not having coding knowledge—the free Model Viewer Editor will handle coding for you.
GLB Export with xStudio
In this blog post, we will use xStudio to create a GLB file. After opening the Microwave project from the previous post in xStudio, we click the Export button and select the glTF option. Then, we need to select the 3D Drive location where the file will be saved
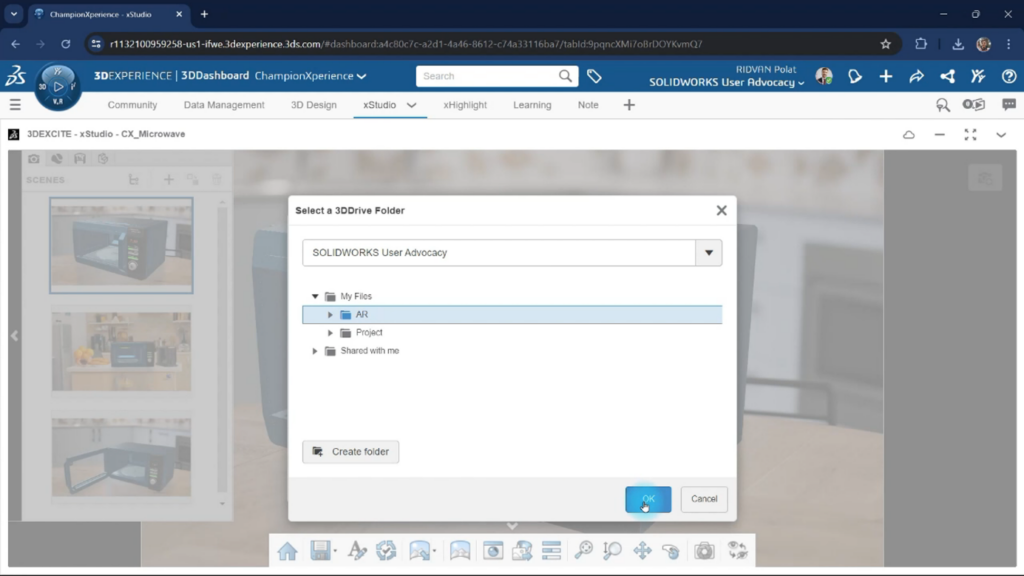
After choosing the folder for saving the file in 3D Drive, we can access the glTF settings. Here, we can adjust the file and texture formats. Let’s explore these settings in detail together.
Format
Defines the file format for the rendered media. You can choose from:
- glTF: Saves data as a JSON file (with or without embedded resources), useful for debugging.
- .glb: Saves data as a compact binary file, ideal for final delivery.
Texture
Reduces the file size for Play Scenarios. Choose from:
- OFF
- JPEG (default option)
- KTX2
Geometry
Enables or disables Geometry Compression to reduce file size for Play Scenarios.
Note: By default, this option is disabled.
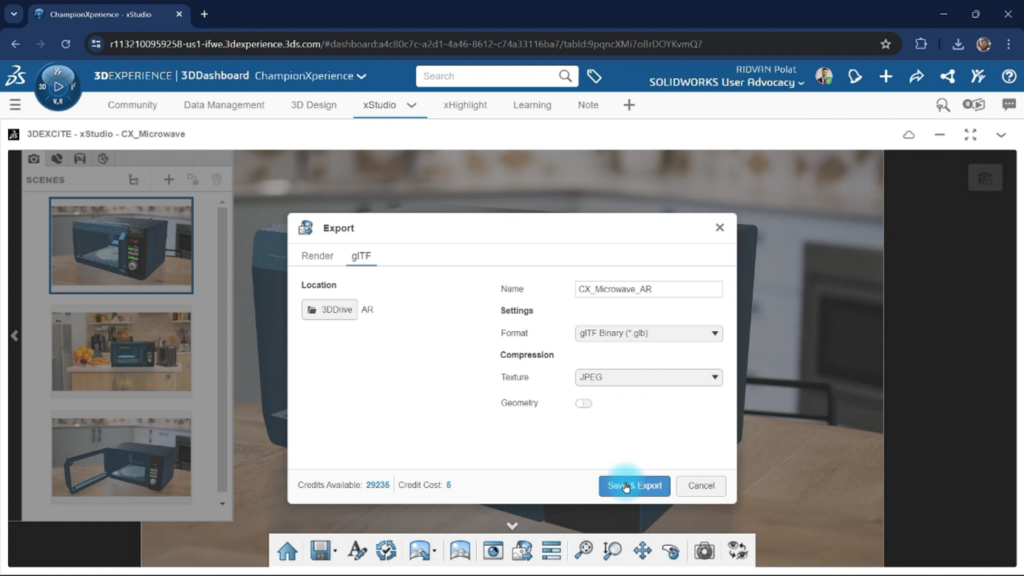
Since the default settings are fine, we click Save and Export. xStudio will then deduct a small amount of credits from your account to create the file.
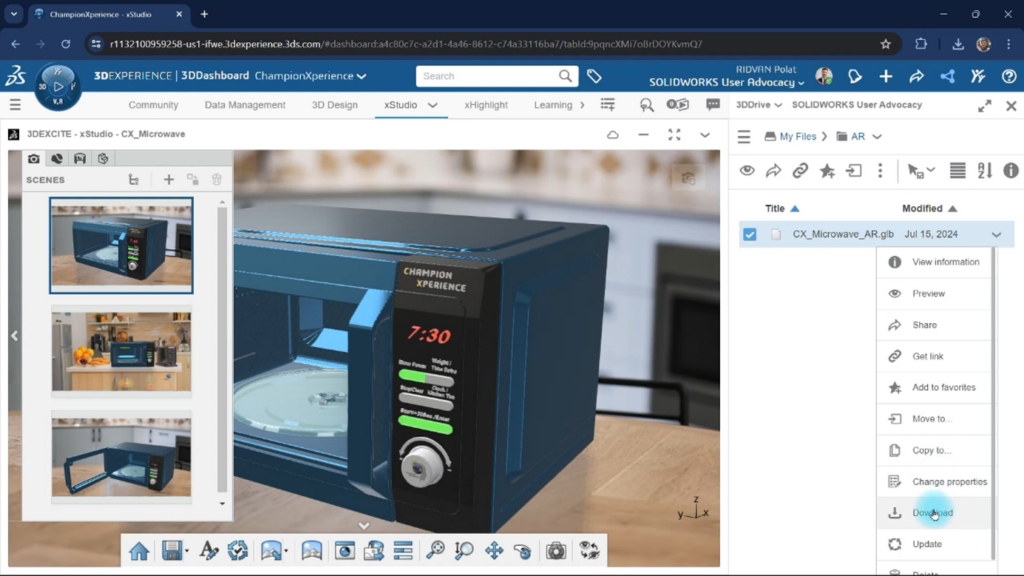
After a brief wait for file generation, we click the Content icon to access our 3D Drive, open the save folder, and download the GLB file.
AR creation with model viewer editor
Model Viewer Editor is a free web tool from Google where you can view glTF and GLB files, customize your model with lighting, HDR (High Dynamic Range), color, and texture, and get the data needed to bring your designs into AR. Before starting our sample project, let’s briefly review the program’s interface.
User Interface
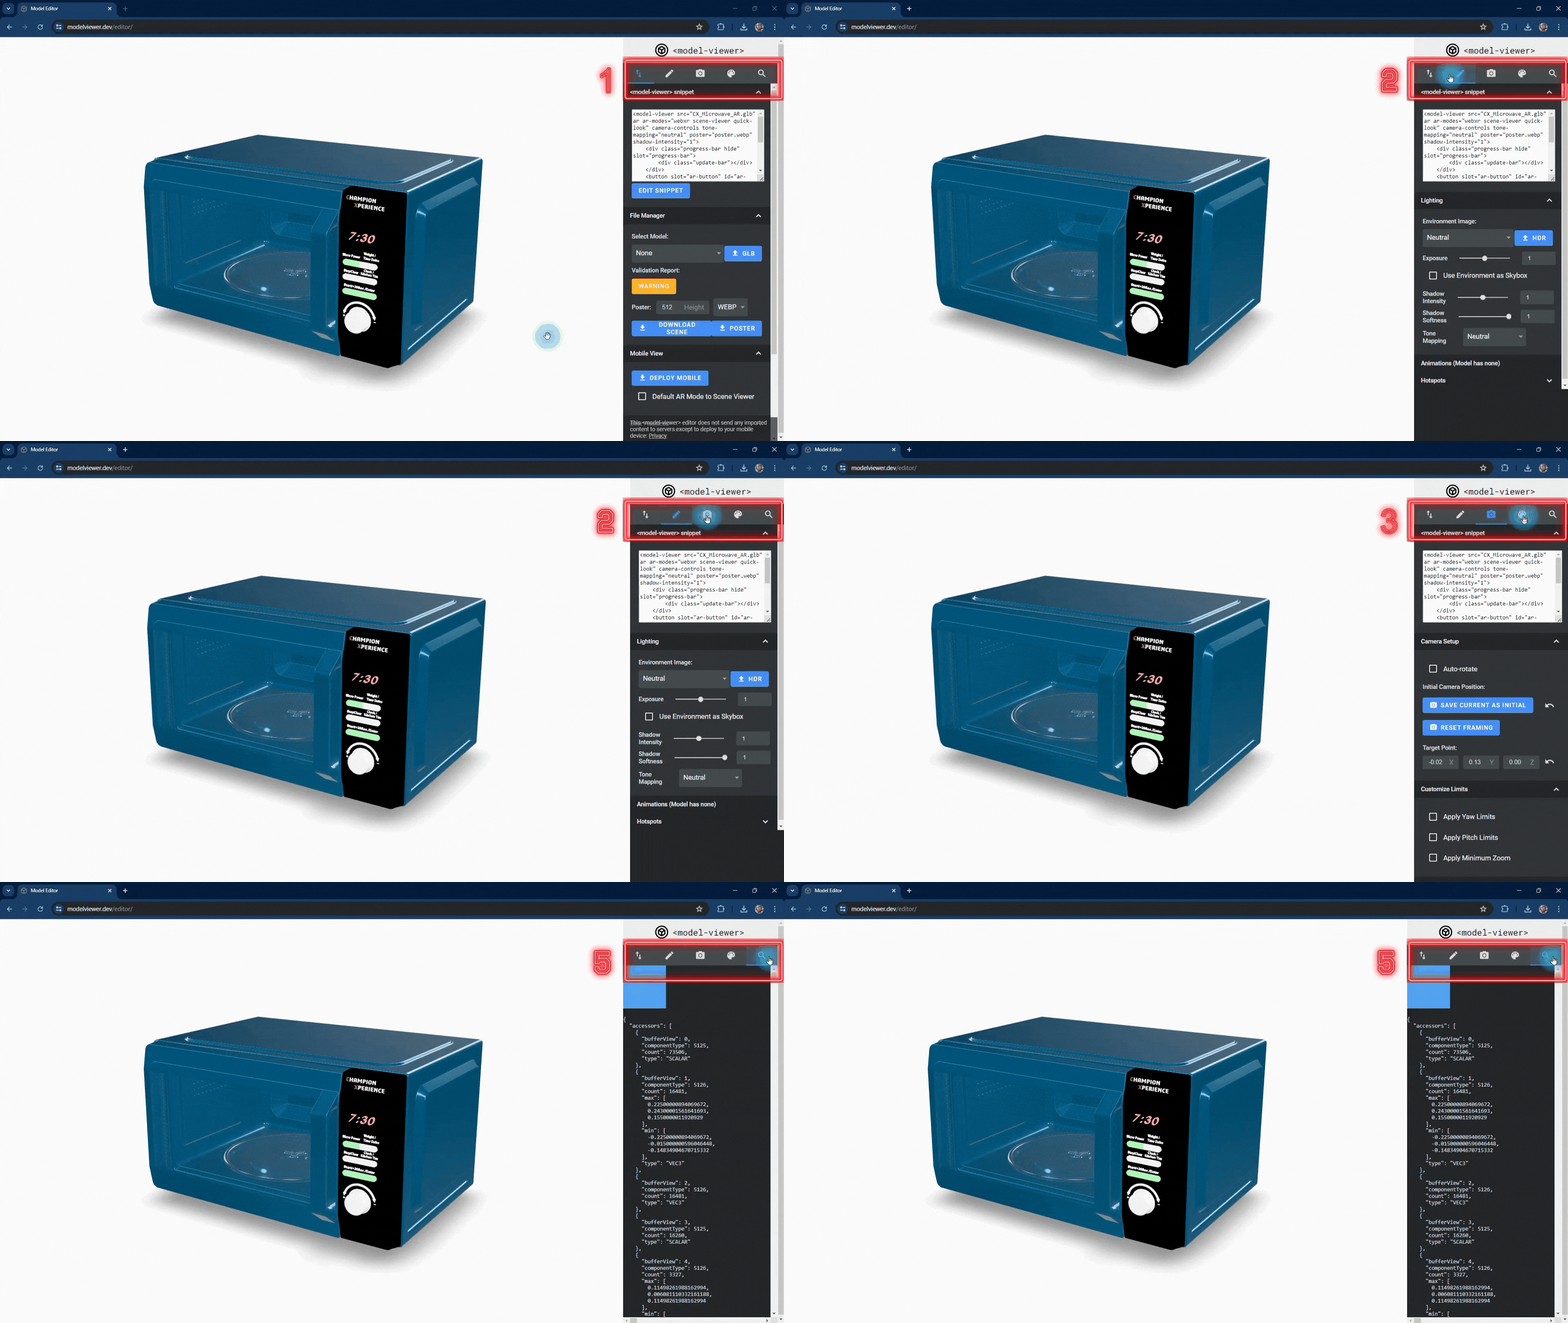
1. Import/Export. You can import your GLB and glTF files. After making changes to your model, you can download the necessary files for AR from this area. You can select the default AR viewer application and set customization options such as a progress bar and AR button, which will guide you and other users while viewing your AR content on a mobile device..
2. Create/Scene. You can adjust settings for your scene such as lighting, HDR, shadows, and tone. By adding hotspots to your model, you can provide users with information about your product. Additionally, if there are any, you can manage the animations defined in your model.
3. Camera. You can enable your model to rotate automatically and limit its movements along the horizontal and vertical axes, as well as set minimum zoom values.
4. Color. You can customize your model’s color, texture, roughness, emissive properties, and many other values in this area.
5. Search. Allows you to search the automatically generated script.
1. Import/Export
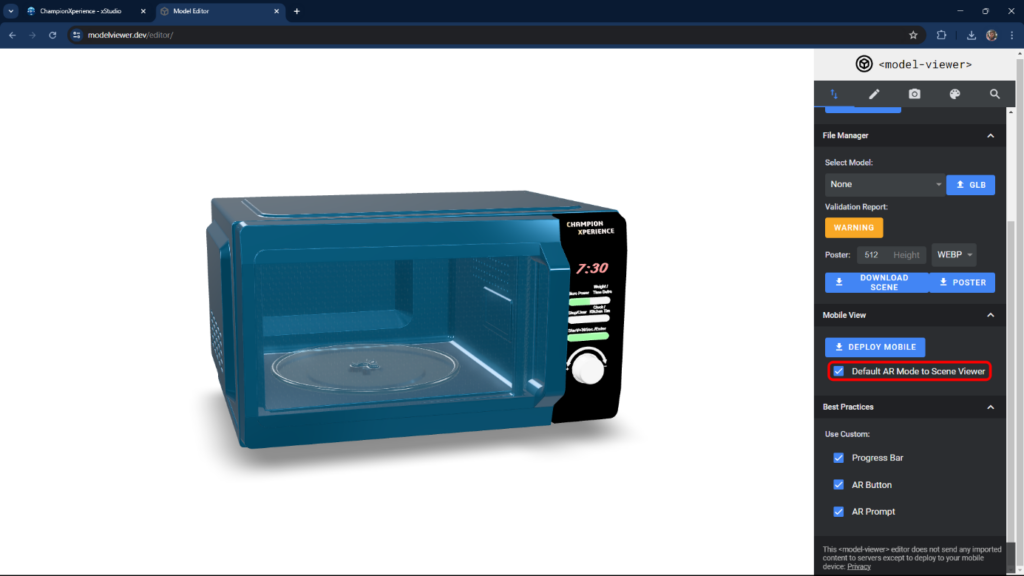
We click on the GLB button in the File Manager section, select the GLB file we created with xStudio, and upload it. Rotate the model with the left mouse button, move it with the right mouse button, and zoom with the mouse wheel.

Select “Default AR Mode to Scene Viewer” to view AR content with the Scene Viewer app on Android. This setting does not affect the Quick Look AR app on iOS devices.
2. Scene Settings
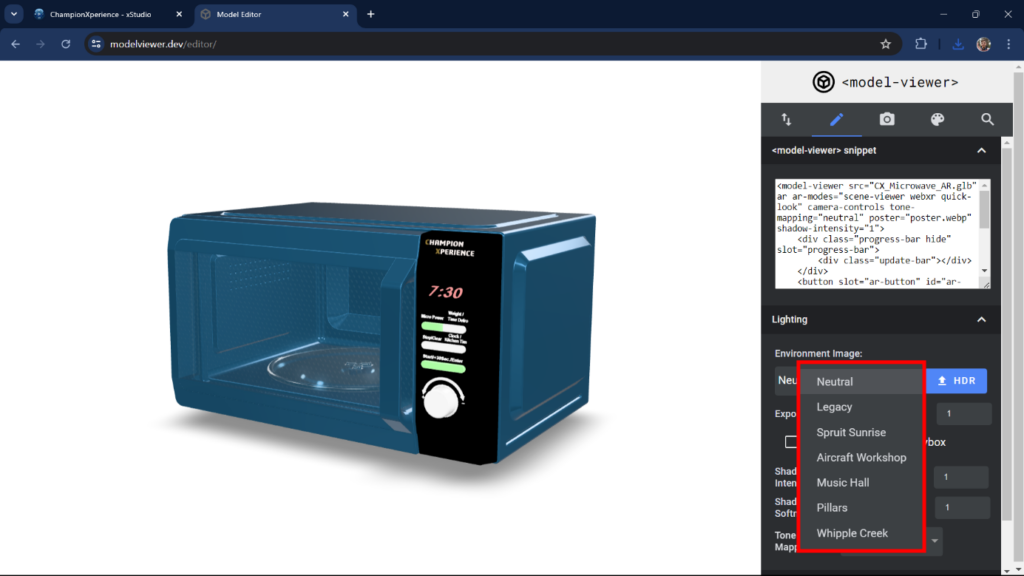
In the Lighting section, you can change the environment image. You can choose from various HDR images in the list or upload your own HDR file. We selected the default “Neutral” option to make the patterns on the microwave’s glass more prominent.
You can change the intensity and softness of the shadow the model casts on the base.

Increasing shadow intensity will darken and highlight the model’s reflections on the base, while decreasing it will make the shadow lighter and less prominent.

As shadow softness decreases, the edges become sharper and more defined, with clearer reflections on the base. Increasing the value makes the edges softer and more blurred, with closer faces more prominent and distant faces less distinct.
3. Camera settings
In the Camera Setup section, enabling the auto-rotate option will make your model rotate automatically around its axis.
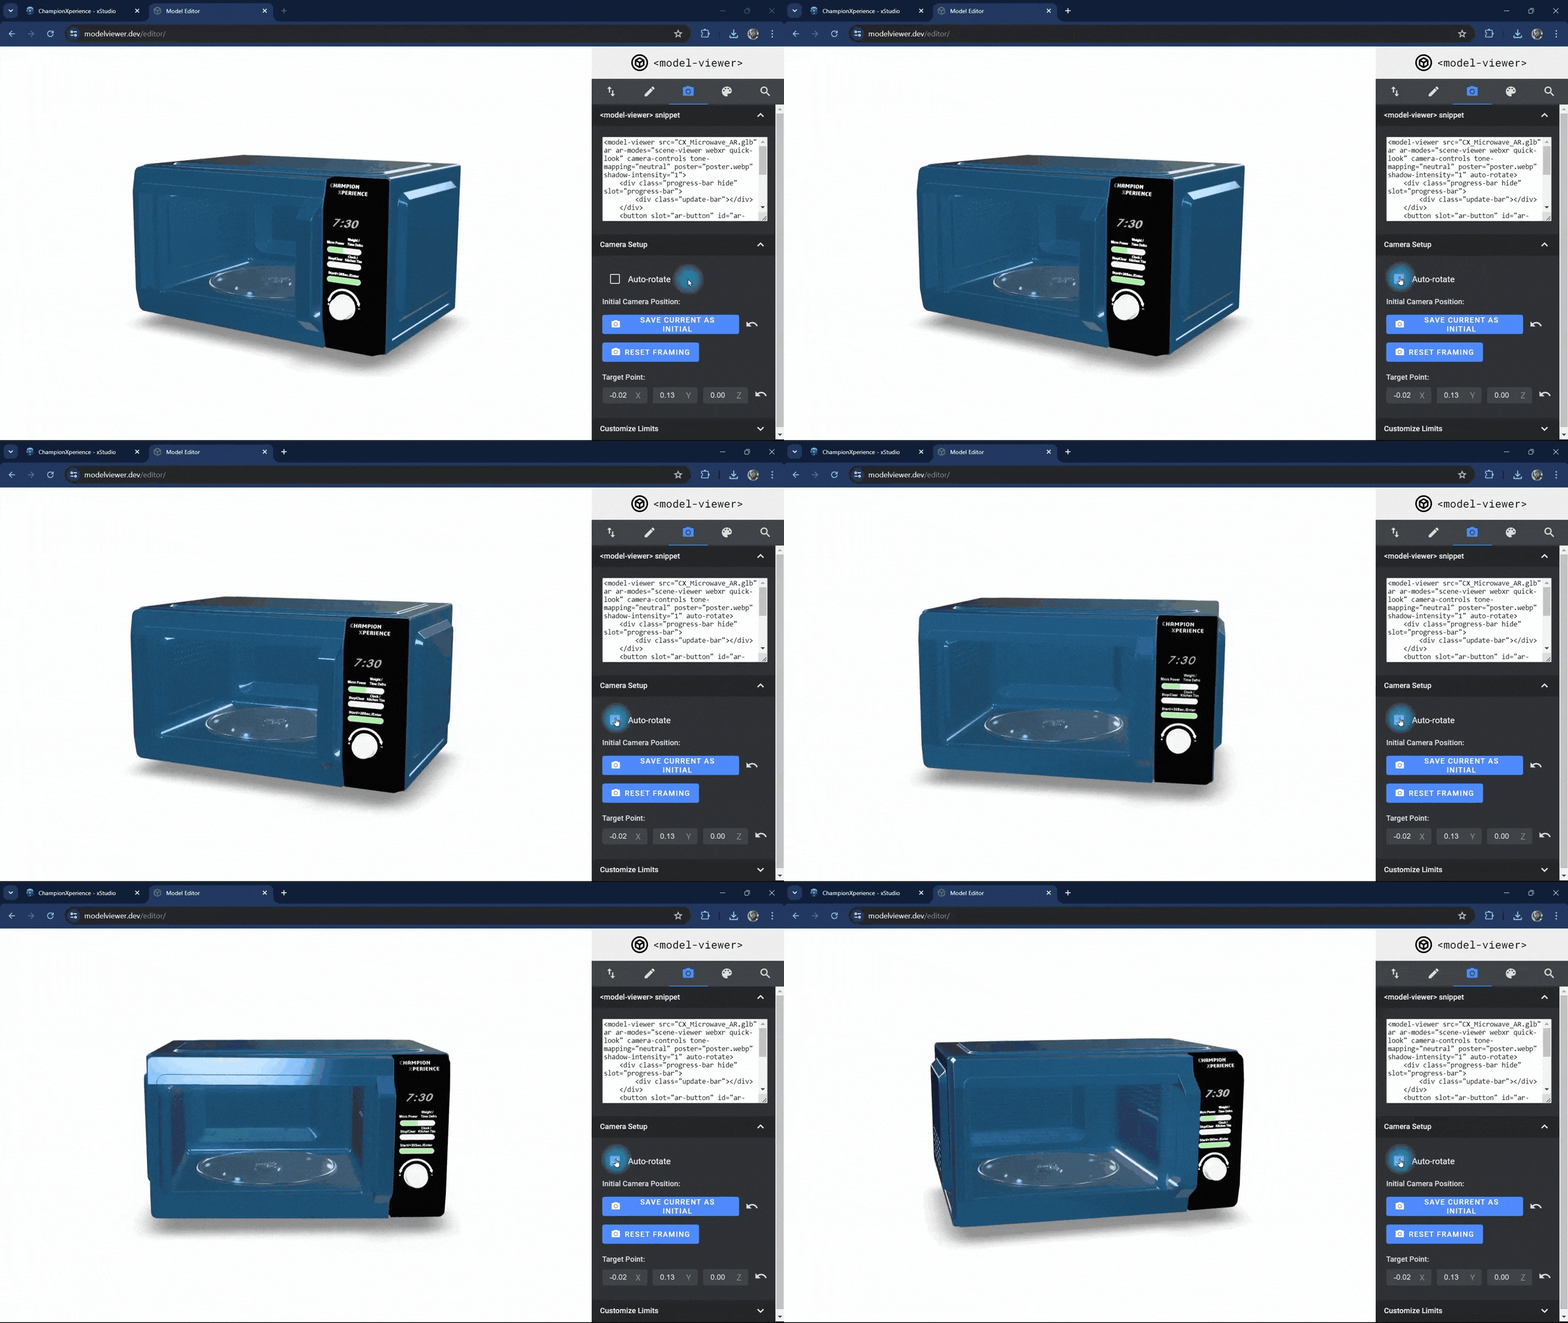
Since we want the Microwave model to stay fixed in the AR environment, we’ll leave the auto-rotate setting inactive.
4. Color
In the Metallic Roughness section, you can adjust the material properties.
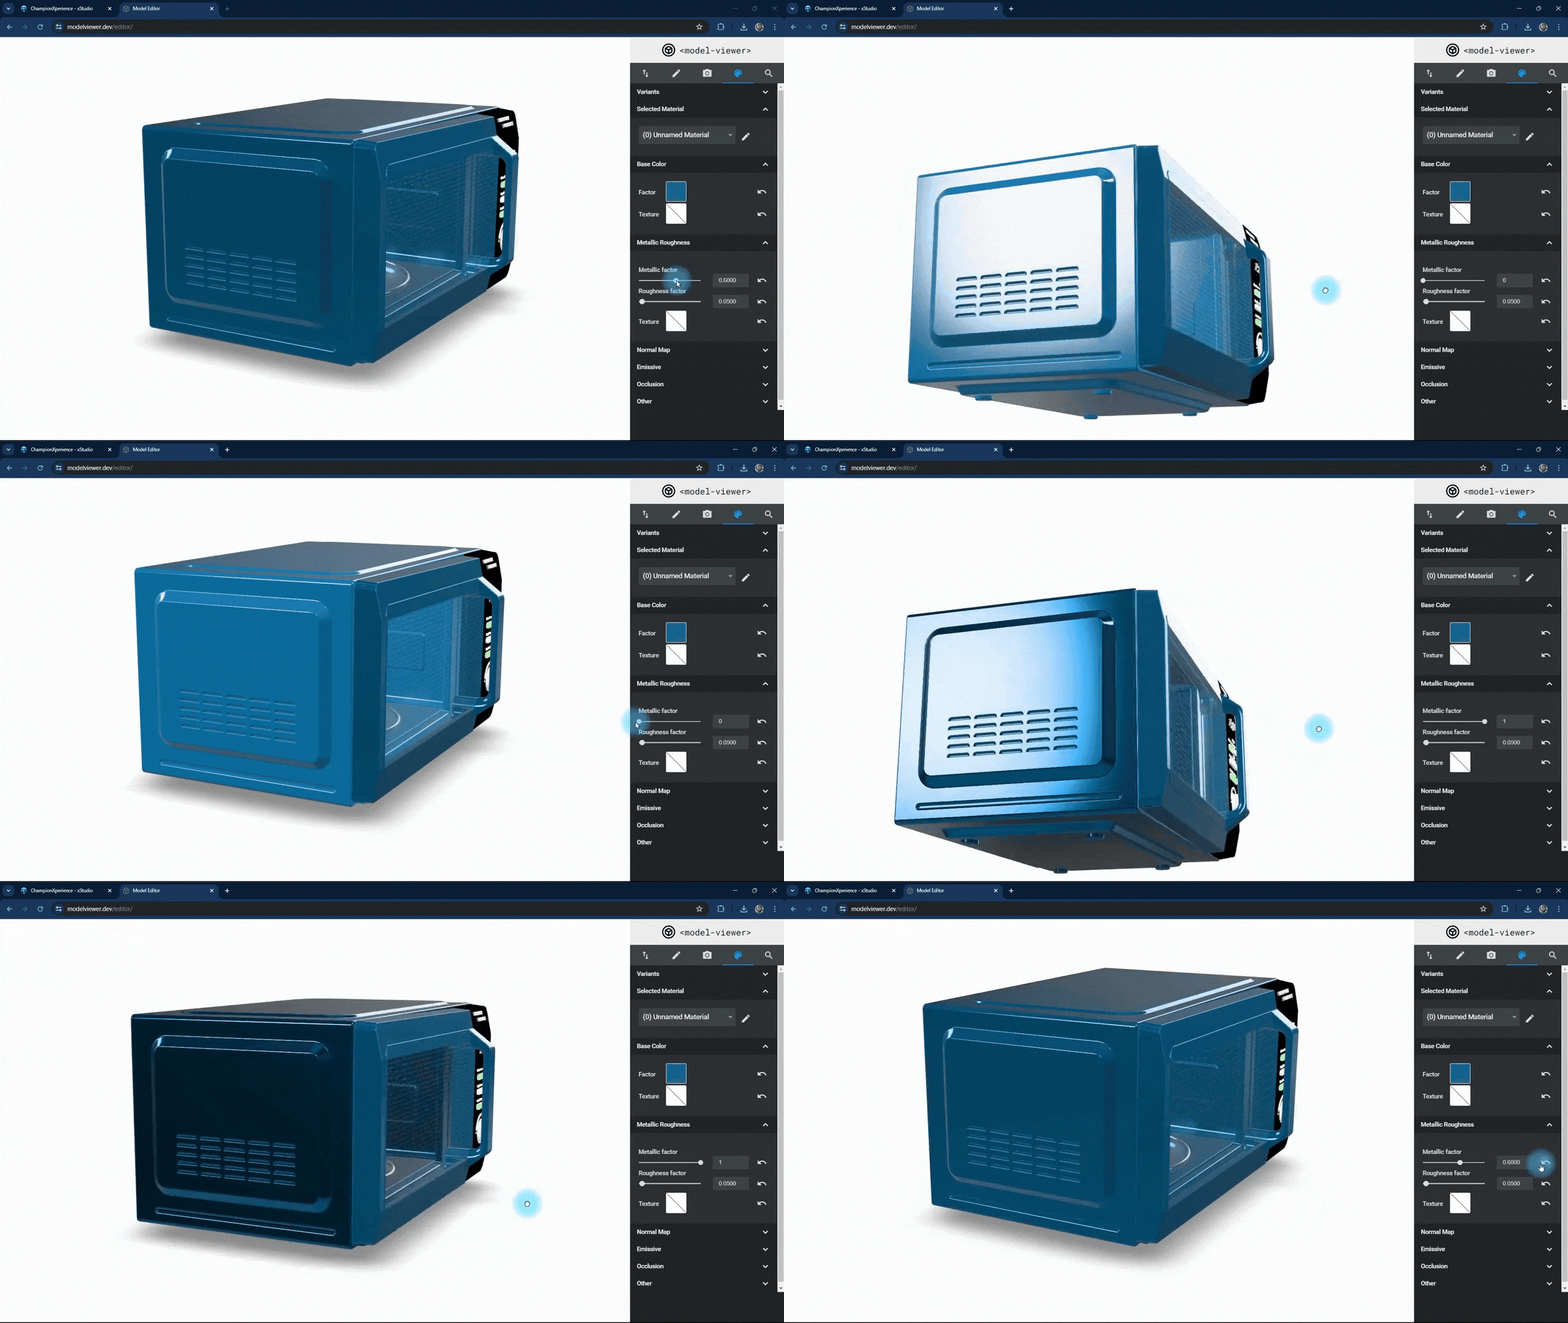
The metallic factor affects how the surface reflects light. As the metallic factor value increases, the selected part’s surface will resemble more metallic material, while a lower value will make the surface behave like a non-metallic material.
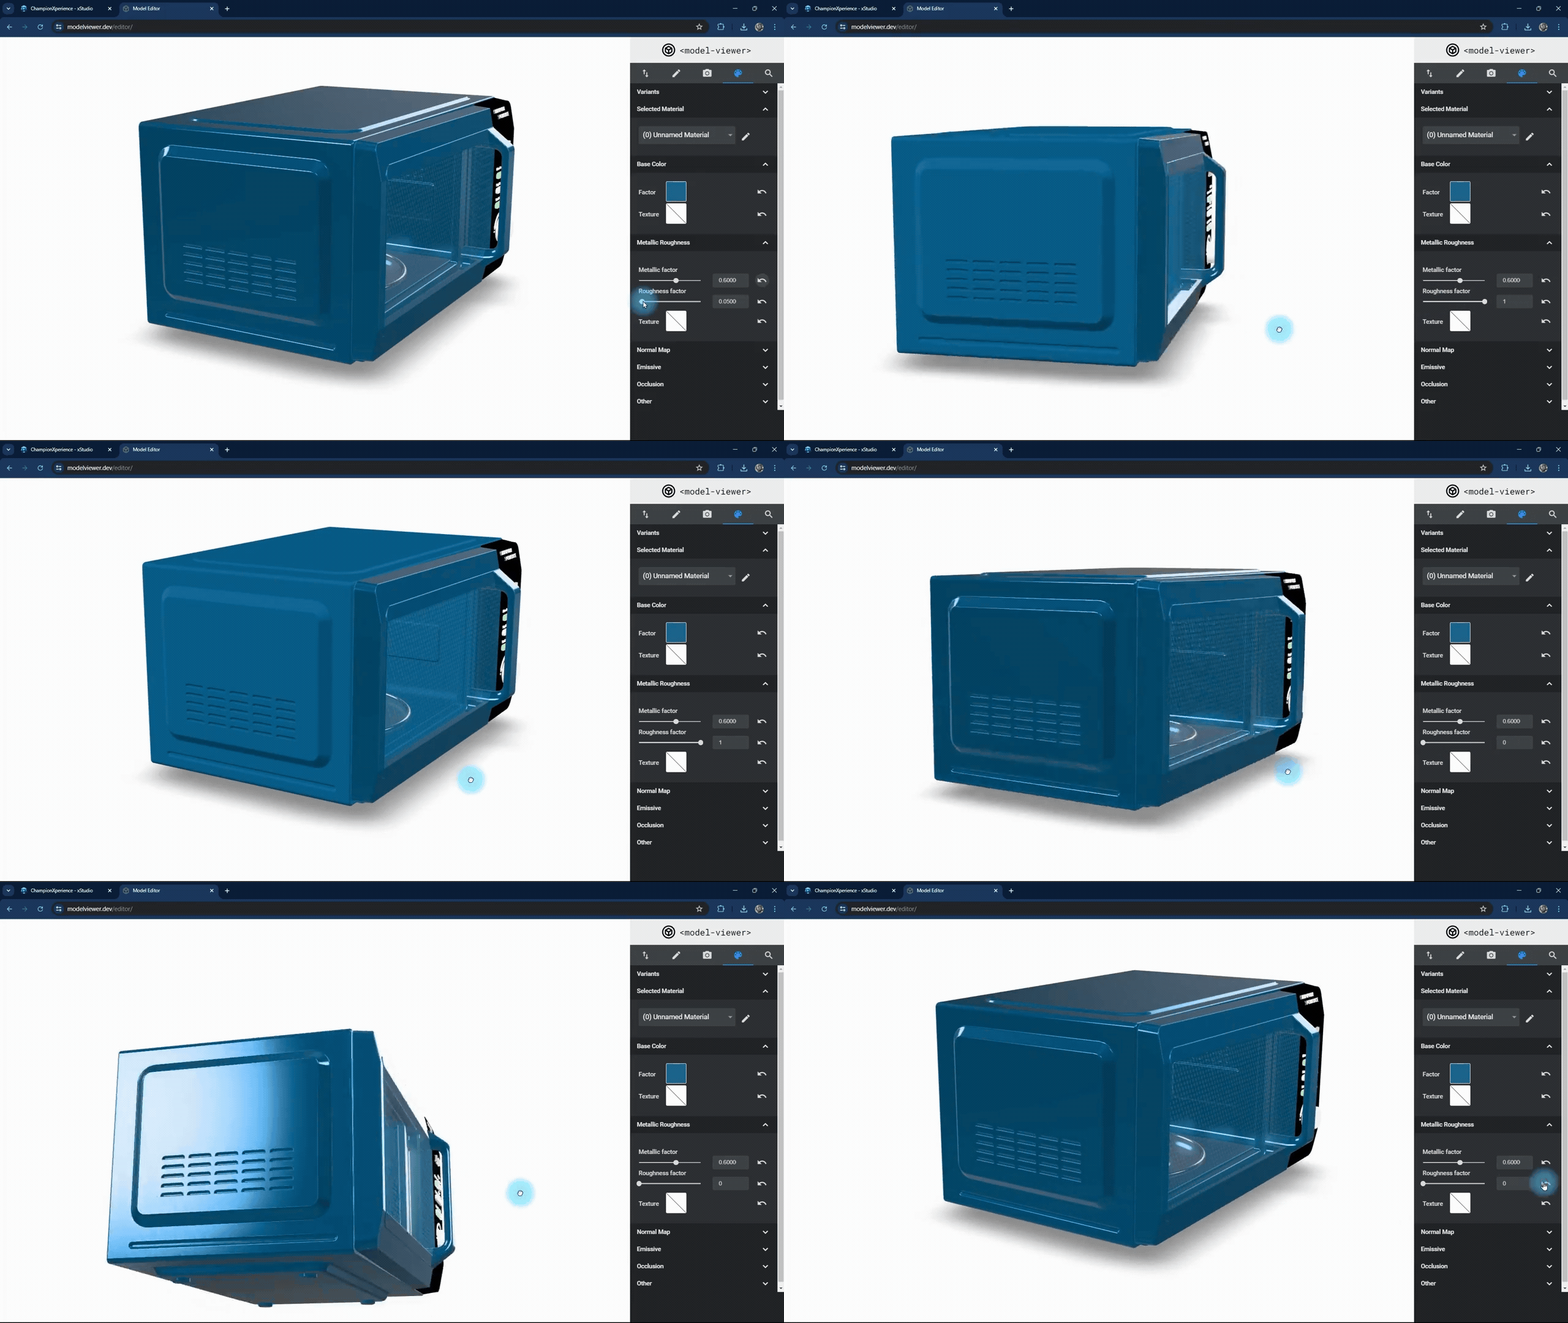
The roughness factor affects how the surface scatters light. Higher values make the surface rougher with less reflection, while lower values make it smoother with more reflection.
We used the default settings here without changes.

After completing these steps, we return to the Import/Export menu and click Download Scene to save the AR data to our computer. The Model Viewer Editor provides a folder with the HTML, JS, and CSS files, along with the GLB file created by xStudio.
Bring your designs to AR
Using xStudio and Model Viewer Editor, we’ve collected all the data needed for AR. To put it simply, these data need to be combined in an environment to produce an output. The quickest way is to upload it to a digital repository and provide a site link. For this project, we’ll use GitHub, a widely-used and free platform in the software industry.
Creating a repository
To start, you’ll need a GitHub account. Once you’ve created it, you’ll see a page similar to the one below.
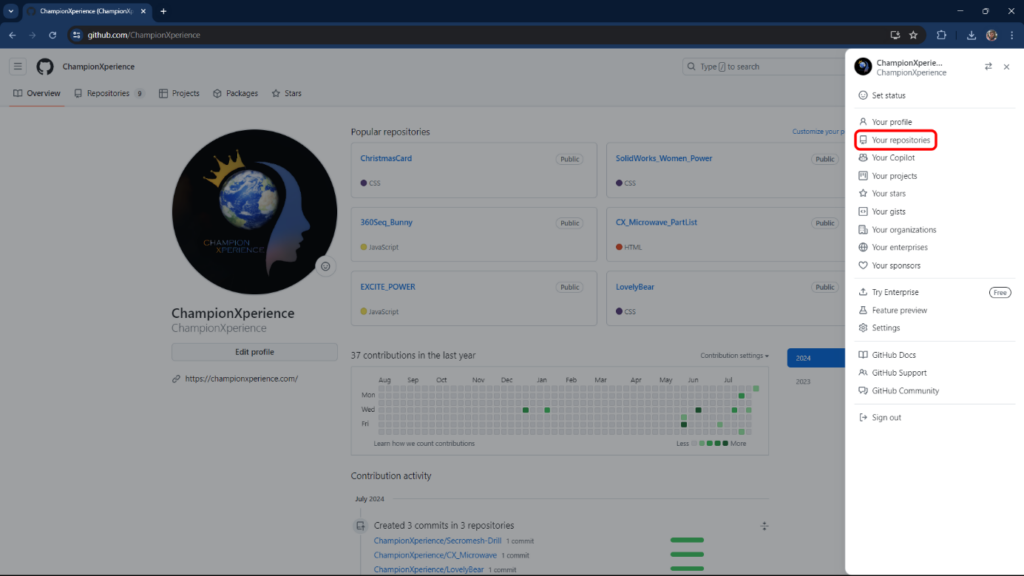
When you click on your profile picture, select Your repositories from the menu. If you have just created a new account, this section will be empty. We will create a new repository and upload the files obtained from Model Viewer Editor to this repository.
Clicking the New button will take you to the repository creation page. Here are two important steps to keep in mind:
- Repository Name: The name you choose will determine the shareable site link. For example, if your username is ChampionXperience and the repository is named CX_Microwave, the link will be championxperience.github.io/CX_Microwave/.
- Repository Visibility: To make your AR content shareable via a link, set the repository visibility to Public, not Private.

We name the repository CX_Microwave and set its visibility to “Public”. Then, we click the “Create Repository” button to finalize the creation.

Once the repository is created, you will be directed to a page where you can upload files to the repository. From this page, select the “uploading an existing file” option and begin the upload process by selecting and uploading all the files obtained from Model Viewer Editor.
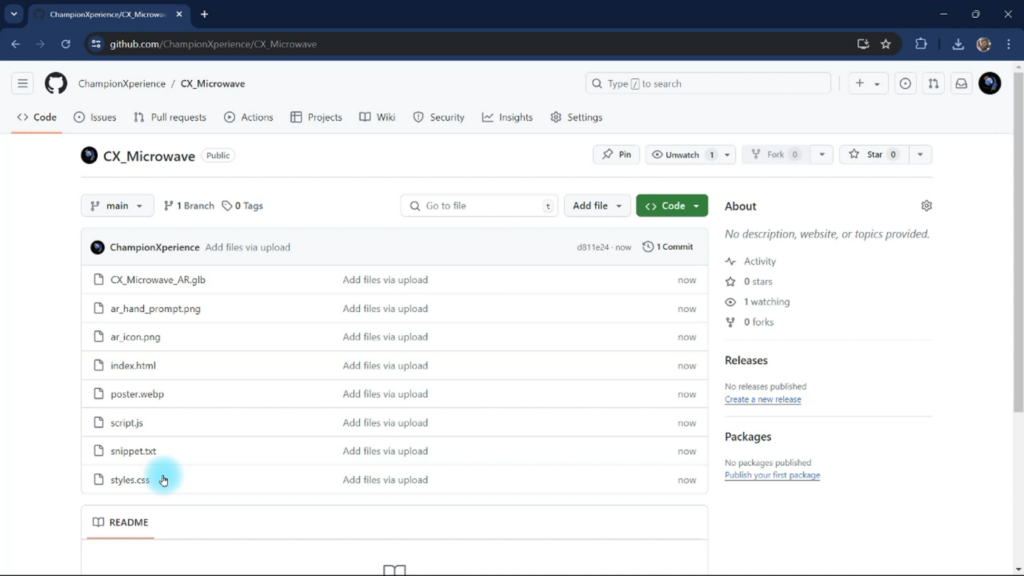
After the upload is complete, click the “Commit Changes” button to finalize the process. You’ll then be redirected to your repository page, where you can view all the uploaded files.
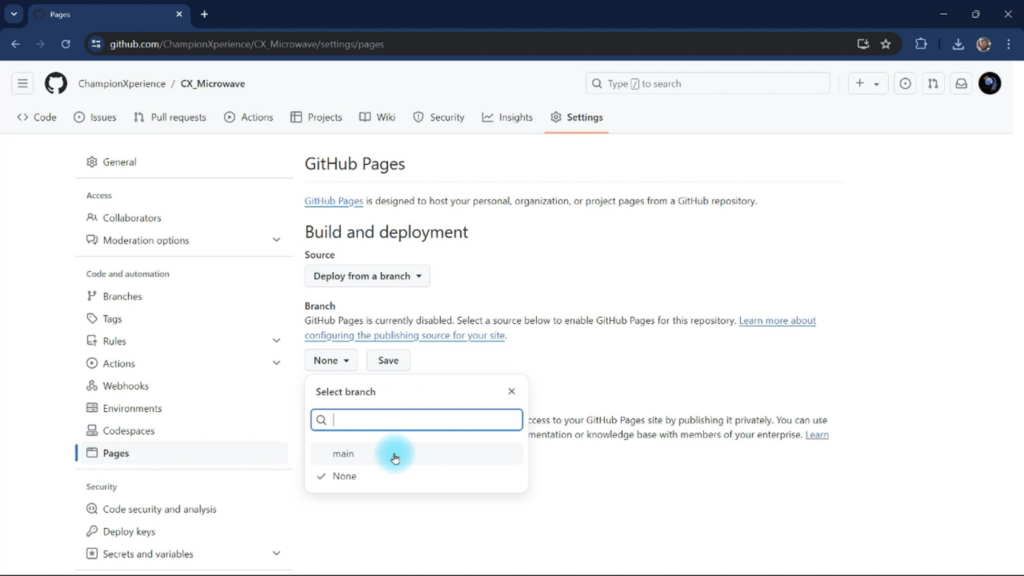
We can now turn our repository into a shareable site link. Click on the “Settings” tab, go to the “Pages” section, set the branch to “Main” instead of None, and save the changes. This will link your repository to a web page.
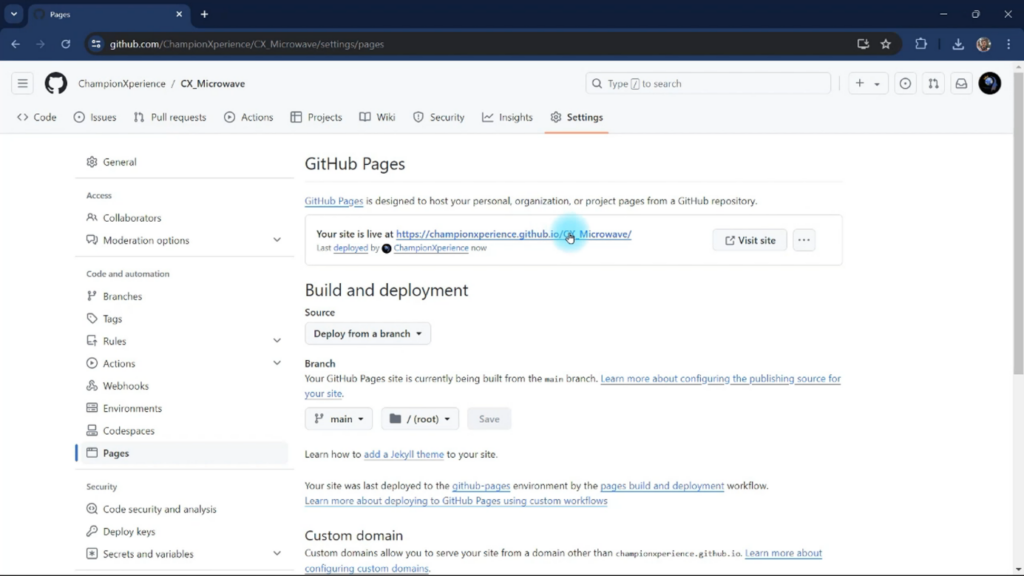
To view our shareable site link, wait a moment and then refresh the page. Once refreshed, the site link will appear. Clicking it will let us view our Microwave model in 3D via a live connection.
Experience AR
When you share the obtained link with your mobile devices that have a camera and AR support, you will be greeted with a button that allows you to view the model in the real environment.

When you tap the “View in your space” button, your default AR application will open and guide you on how to view the model in your environment. You’ll then be able to see your model in the real environment.

To rotate the model, touch the white frame at its base and turn it left or right. Move the model by dragging it with your finger. To zoom in and out, use a pinch gesture.

After this step, move your phone around to explore the model. Bring your phone closer to enter the model’s interior and view its details up close.
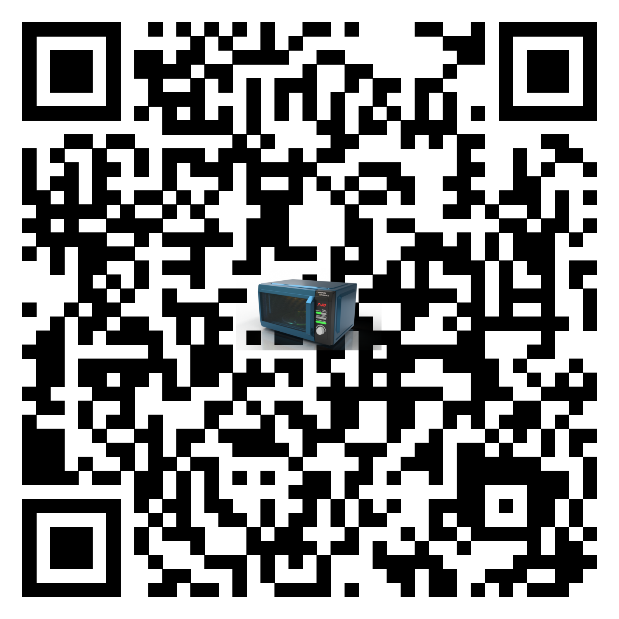
Now that you have learned how to bring your designs into the AR environment, you can scan the QR code above to enjoy the augmented reality experience.


